A little paint can change your kitchen look and can breathe new life into the heart of your home. We paint our kitchens or change their organization to give them a new look or to change the environment. Cabinets are the core element of a kitchen, and if you are reading this article, then you are looking for the steps to clean your cabinets for painting. You are about to paint, and it’s important to clean your cabinets step by step in this article. We are going to guide you to the best steps on ‘How to Clean Kitchen Cabinets for Painting.’ By cleaning off dirt and grease and getting surfaces ready for paint, each step is made to make sure your kitchen can get the best makeover.
All Materials are Basic Needs for Clean Kitchen Cabinets for Painting
Some materials are needed before you start your cleaning process. Here is the list-
Mild detergent or dish soap
Water
Soft cloth or sponge
Bucket
Screwdriver (if removing hardware)
Painter’s tape
Drop cloths or plastic sheets
Degreaser (optional for stubborn grease)
Before you Start Cleaning, Here are Some Tips-
Put on your safety gear.
Remove any objects from the work area.
Use a leak-proof floor protector to cover the floor.
Check the condition of the old paint; if it’s in good shape, proceed to the next step. If not, use a paint stripping product to remove the old paint and prepare the surface for a new, smooth finish.
Guide to Step-by-Step Process to Clean Kitchen Cabinets for Painting
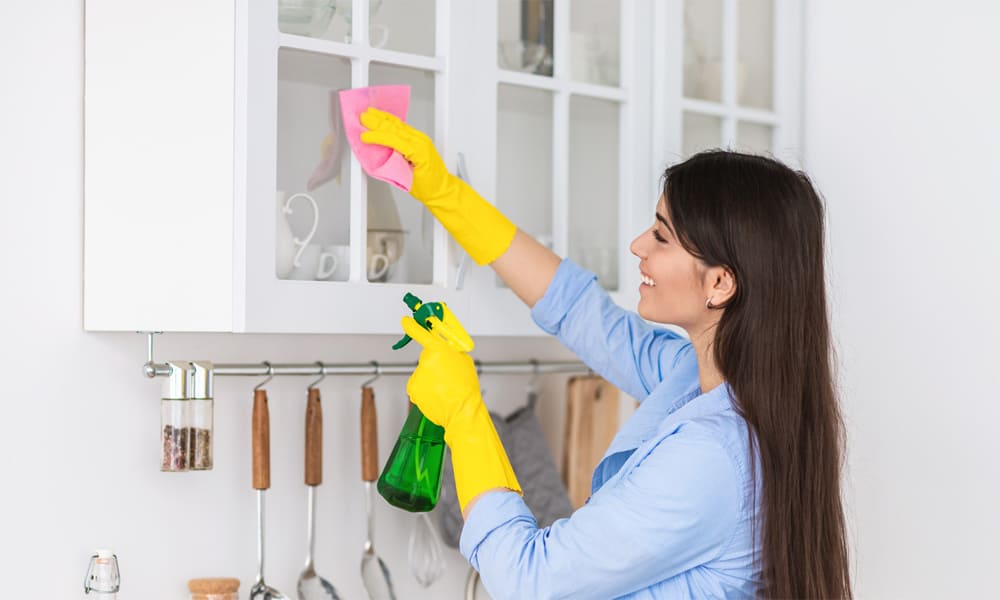
We have all the preparation and are ready to clean our cabinets now. Because we are cleaning this for painting, we have to clean it perfectly. Once you have all the supplies gathered and now ready to clean, let’s start step by step.
1. Dust Cabinets
Before starting the cleaning, make sure you remove dust from the cabinet first. Use a soft cloth or duster to wipe or brush away any dust or dirt on the cabinet. This step will make the cleaning process more effective.
This is a basic process, and you should do that before using any liquid solution to clean the cabinet. It is like a little clean-up before deeper cleaning, and it is more effective. This makes sure you get rid of the easy stuff first.
2. Remove Cabinet Hardware
Told you about screwdriver, remember? This time, we need that. If you need to remove hardware, you need this material. It is crucial to remove the hardware and doors to make sure you can paint smoothly. If you skip this step, you are going to regret it later. Removing hardware can help you remove the previous paint (If you have one) and clean it wisely.
Remove all the knobs and handle by using a screwdriver; you have straight cabinets now. If you are using hardware, then make sure you label each part. If there are any hinges, then you may have to use a drill to remove them. Once you have removed all the cabinet knobs, handles, and other hardware, the cleaning process becomes easier, and you can paint without hindrance.
3. Protect Surrounding Areas
Regarding the necessary materials, we have listed drop cloths or plastic sheets; now, we are going to use them to protect our surrounding areas. This is crucial to protect the surrounding area and ensure a clean and efficient cabinet-cleaning process. Start with covering the floor, countertops, and appliances with drop cloths or plastic sheets. These plastic clothes will keep your surrounding area safe from any spills or splashes while you are cleaning. Also, it will help when you paint your cabinet. These clothes or plastic will protect your surrounding area from paint.
This process minimizes the risk of damage to your surrounding area and ensures a smooth cabinet cleaning experience. You can have a nice and stress-free cleaning and painting.
4. Prepare a Cleaning Solution
You have noticed the material list; mild detergent or dish soap is listed. These are the basic cleaning solutions. It is important to use the right products for cleaning. Mixing a solution of warm water and mild detergent or dish soap is a basic solution to cleaning. If you find any stubborn grease or grime, you can add a degreaser to the mix.
You can replace dish soap with vinegar. That’s a domestic way. Some people might not like the smell of vinegar, so dish soap is best. In the same way, you can mix some baking soda with the solution if your cabinet has tougher stains. Now, use a soft cloth or sponge to clean the cabinet. Now, a cleaning solution is ready to tackle any dirt or grime, leaving your cabinets clean for paint.
5. Wash Cabinets
We all know how to wash, so we’re still giving you the proper guide. You have the solution: you have a sponge or soft cloth. Just use the soft cloth or sponge, dip it into the solution you made, and squeeze it out. Now wipe down all the surfaces of the cabinet.
Always find a spot where there is a lot of grease or dirt. Take time and clean them properly. Because grease or dust can dull the paint and may not adjust with the cabinet perfectly, make sure not to use too much water. Too much water can cause damage.
6. Scrub Stubborn Stains
You may find some stubborn stains in cabinets. No worry!! It’s normal! If you find any stain that does not come out with a sponge or cloth, you can use a toothbrush or soft type brush to wipe out the stain.
When you are removing stains carefully, be careful not to scratch the surface. Keep in mind that if you clean the cabinet properly, the paint will look good and stay in the cabinet for a long time.
7. Rinse and Dry
After scrubbing and cleaning the cabinet with a solution, we need to rinse and dry it. You can use a clean dump cloth to remove any soap residue. Wipe down the cabinet with the cloth. Now, take a dry cloth to dry out the cabinet.
When you are using a dry cloth, make sure the fibre of the cloth does not come out. Otherwise, it can be stuck on the cabinet, and the paint may fade after painting. Use some soft cloth and make sure your cabinet becomes dry properly before painting.
8. Tape Off Areas
You may notice there is a tape in the materials list. Why need tape? You will need the tape when you are not planning to paint the whole cabinet. You need to use the tape to cover areas you are not about to paint or put other paint later, such as walls or adjoining cabinets.
After tapping the areas, you are now ready to paint the cabinet like you want. It will feel satisfying when you remove the tapes after painting.
9. Prime if Necessary
It is an optional process but needs an old or repaired cabinet. If your cabinet is dark or you have made any repairs before, it will need prime. In repaired cabinets or dark cabinets, it is good to use prime before painting.
Prime can help the paint adhere better. Also, if you are looking for a smooth and nice finish to paint, you need to use prime. It’s an option but necessary.
10. Painting
By following all the steps, you are ready to paint your cabinet the way you want. Once your cabinets are clean, dry, and prepped, you are ready to paint.
Use a smooth brush and high-quality paint for your kitchen cabinet. Use expert tips for painting, get the perfect painted cabinet you always wanted, and change the kitchen environment.
Conclusion
Making your kitchen cabinets look brand new with paint is a cool project. We showed you how to do it step by step in our guide on ‘How to Clean Kitchen Cabinets for Painting.’ It’s easy!
We talked about wearing safety gear and covering stuff around your cabinets. Then, we explained how to mix a simple cleaning solution to clean your cabinets properly. Don’t forget to dust them off first!
We also said it’s important to be gentle and not use too much water when cleaning. And, of course, keep your countertops and floors safe from any mess.